Rustic Revival: Embracing Rustic Home Ideas

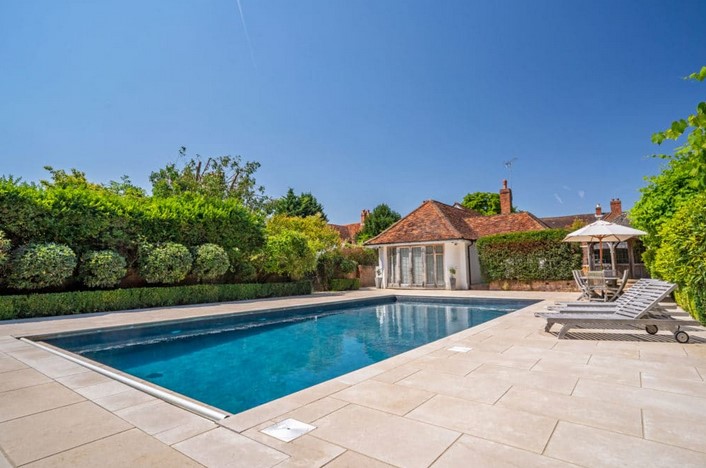
Rustic Revival is a trend that is taking the home decor world by storm. It is a style that embraces the beauty of natural materials, such as wood, stone, and metal, and celebrates the charm of rustic living. Rustic Revival is all about creating a cozy and inviting atmosphere in your home, while still maintaining a modern and stylish look. Whether you are looking to add a touch of rustic charm to your existing decor, or you are starting from scratch, Rustic Revival has something for everyone. From furniture and accessories to wall art and lighting, Rustic Revival has everything you need to create a warm and inviting home.

How to Incorporate Rustic Revival Style into Your Home: Tips and Tricks for a Cozy, Country Feel
Rustic revival style is a popular trend in home décor that combines the charm of country living with modern touches. This style is perfect for creating a cozy, inviting atmosphere in any home. Here are some tips and tricks for incorporating rustic revival style into your home:

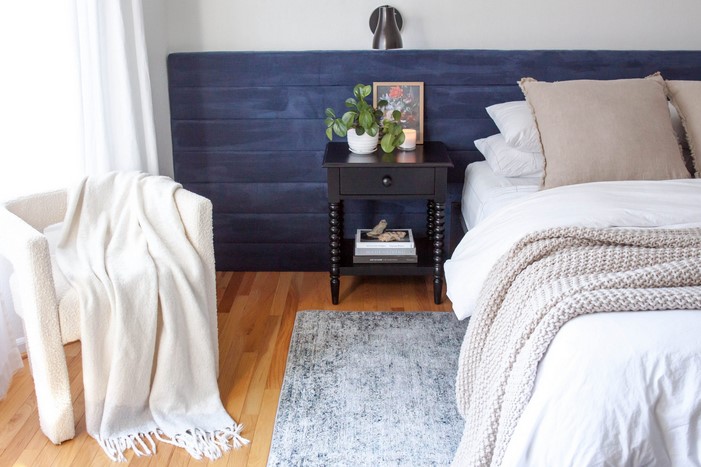
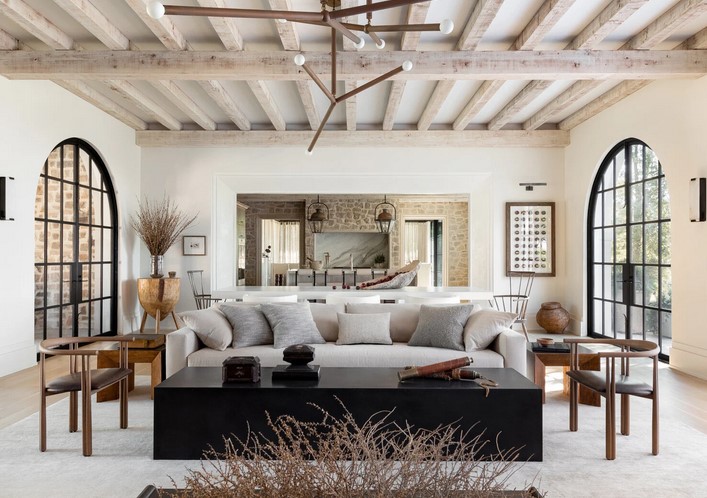
1. Choose natural materials. Natural materials such as wood, stone, and metal are essential for creating a rustic look. Incorporate these materials into your furniture, flooring, and décor to give your home a warm, inviting feel.

2. Incorporate vintage pieces. Vintage pieces such as antique furniture, old tools, and rustic décor can add a unique touch to your home. Look for pieces at flea markets, antique stores, and online to find the perfect pieces for your home.

3. Add texture. Textured fabrics such as burlap, linen, and wool can add a cozy, rustic feel to any room. Incorporate these fabrics into your furniture, curtains, and rugs to create a warm, inviting atmosphere.

4. Use neutral colors. Neutral colors such as beige, brown, and gray are perfect for creating a rustic look. Incorporate these colors into your walls, furniture, and décor to create a calming, inviting atmosphere.

5. Incorporate natural elements. Natural elements such as plants, flowers, and wood can add a touch of nature to your home. Incorporate these elements into your décor to create a cozy, rustic atmosphere.

By following these tips and tricks, you can easily incorporate rustic revival style into your home. This style is perfect for creating a cozy, inviting atmosphere in any home.

The Benefits of Rustic Revival: Why You Should Embrace the Natural Aesthetic in Your Home
The rustic revival is a growing trend in home décor that celebrates the beauty of natural materials and the charm of vintage pieces. This aesthetic is characterized by a warm, cozy atmosphere that evokes a sense of nostalgia and comfort. By embracing the rustic revival in your home, you can create a unique and inviting space that reflects your personal style.

The rustic revival is a great way to bring the outdoors inside. Natural materials such as wood, stone, and metal can be used to create a cozy atmosphere that is both inviting and timeless. Wood furniture and accents can add a rustic charm to any room, while stone fireplaces and metal fixtures can create a sense of warmth and character. By incorporating natural elements into your home, you can create a space that is both inviting and unique.

The rustic revival also offers a great opportunity to incorporate vintage pieces into your home. Vintage furniture and accessories can add a unique touch to any room, while also providing a sense of history and nostalgia. Vintage pieces can be found at flea markets, antique stores, and online, making it easy to find the perfect piece to fit your style.

In addition to its aesthetic appeal, the rustic revival also offers practical benefits. Natural materials are often more durable and long-lasting than synthetic materials, making them a great choice for furniture and accents that will stand the test of time. Natural materials also tend to be more eco-friendly, as they are often sourced from sustainable sources.

Finally, the rustic revival is a great way to create a unique and inviting atmosphere in your home. By embracing the natural aesthetic, you can create a space that is both cozy and inviting. Whether you are looking to create a rustic retreat or a modern oasis, the rustic revival can help you create a space that is both beautiful and functional.The Rustic Revival movement has been gaining momentum in recent years, and it’s easy to see why. Rustic home ideas offer a cozy, inviting atmosphere that is perfect for creating a warm and inviting living space. From rustic furniture to natural materials, there are plenty of ways to incorporate rustic elements into your home. Whether you’re looking for a complete overhaul or just a few touches here and there, embracing rustic home ideas can help you create a cozy and inviting living space that you’ll love for years to come.

Coping with Style: Exploring the World of Pool Coping

Coping with Style: Exploring the World of Pool Coping is a comprehensive guide to the art of pool coping. It is a must-read for anyone interested in learning more about the history, techniques, and styles of pool coping. This book provides an in-depth look at the different types of coping, from traditional coping to modern coping, and how to use them to create unique and beautiful pool designs. It also covers the basics of pool maintenance and repair, as well as tips and tricks for getting the most out of your pool. Whether you are a beginner or an experienced pool owner, this book will provide you with the knowledge and skills you need to make your pool look its best.

How to Choose the Right Pool Coping for Your Swimming Pool: A Guide to Different Types of Pool Coping
Pool coping is an important part of any swimming pool design. It is the material that lines the top edge of the pool, providing a finished look and protecting the pool structure from the elements. There are many different types of pool coping available, and choosing the right one for your pool can be a daunting task. This guide will provide an overview of the different types of pool coping and the factors to consider when selecting the best option for your pool.

The most common type of pool coping is precast concrete. Precast concrete is a durable and cost-effective option that is available in a variety of colors and textures. It is easy to install and can be customized to fit the shape of your pool. Precast concrete is also a good choice for pools with a lot of foot traffic, as it is slip-resistant.

Another popular option is natural stone pool coping. Natural stone is a beautiful and timeless choice that adds a unique look to any pool. It is available in a variety of colors and textures, and can be customized to fit the shape of your pool. Natural stone is also a good choice for pools with a lot of foot traffic, as it is slip-resistant.

Brick pool coping is another popular option. Brick is a classic choice that adds a timeless look to any pool. It is available in a variety of colors and textures, and can be customized to fit the shape of your pool. Brick is also a good choice for pools with a lot of foot traffic, as it is slip-resistant.

When selecting the right pool coping for your pool, there are several factors to consider. First, consider the overall design of your pool. Different types of pool coping can complement different pool designs. For example, natural stone pool coping can add a classic look to a traditional pool, while brick pool coping can add a modern look to a contemporary pool.

Second, consider the climate in which your pool is located. Different types of pool coping are better suited for different climates. For example, precast concrete is a good choice for pools in warm climates, as it is resistant to heat and UV rays. Natural stone is a good choice for pools in cold climates, as it is resistant to freezing temperatures.

Finally, consider the amount of foot traffic your pool will receive. Different types of pool coping are better suited for different levels of foot traffic. For example, precast concrete is a good choice for pools with a lot of foot traffic, as it is slip-resistant. Natural stone is a good choice for pools with less foot traffic, as it is more delicate and can be easily damaged.

By considering the design of your pool, the climate in which it is located, and the amount of foot traffic it will receive, you can select the right pool coping for your pool. With the right pool coping, you can create a beautiful and functional swimming pool that will last for years to come.

The Benefits of Pool Coping: Why You Should Invest in Quality Pool Coping for Your Swimming Pool
Pool coping is an important part of any swimming pool installation. It is the material that lines the top edge of the pool, providing a smooth transition between the pool and the surrounding deck or patio. Pool coping also serves an important functional purpose, as it helps to protect the pool structure from water damage and provides a non-slip surface for swimmers. Investing in quality pool coping is essential for ensuring the longevity and safety of your swimming pool.

The most important benefit of pool coping is its ability to protect the pool structure from water damage. Pool coping acts as a barrier between the pool and the surrounding deck or patio, preventing water from seeping into the pool structure and causing damage. Quality pool coping is also designed to be durable and resistant to the elements, ensuring that it will last for many years.

Pool coping also provides a non-slip surface for swimmers. This is especially important for pools with a lot of foot traffic, as it helps to reduce the risk of slips and falls. Quality pool coping is designed to be slip-resistant, providing a safe and secure surface for swimmers.

Pool coping also adds aesthetic value to your swimming pool. Quality pool coping is available in a variety of colors and styles, allowing you to customize the look of your pool. This can help to enhance the overall appearance of your pool and make it more inviting for swimmers.

In conclusion, investing in quality pool coping is essential for ensuring the longevity and safety of your swimming pool. Pool coping provides a barrier between the pool and the surrounding deck or patio, protecting the pool structure from water damage. It also provides a non-slip surface for swimmers and adds aesthetic value to your pool. Investing in quality pool coping is an important part of any swimming pool installation.In conclusion, Coping with Style: Exploring the World of Pool Coping is an excellent resource for anyone interested in learning more about the art of pool coping. It provides an in-depth look at the history, techniques, and tools used in pool coping, as well as tips and tricks for mastering the craft. With its comprehensive coverage of the subject, Coping with Style is an invaluable resource for anyone looking to take their pool coping skills to the next level.

How to Tuft a Headboard: DIY Upholstery Tips

This article provides a comprehensive guide on how to tuft a headboard, a popular DIY upholstery project. It offers step-by-step instructions, from gathering materials to the actual tufting process, and shares useful tips to ensure a successful outcome. Whether you’re a seasoned DIY enthusiast or a beginner looking to add a personal touch to your bedroom decor, this guide will equip you with the necessary knowledge and skills to create a beautifully tufted headboard.

Mastering the Art of Tufting: DIY Upholstery Tips for a Stunning Headboard
Tufting, a classic upholstery technique, has been used for centuries to add depth, detail, and richness to furniture. It involves the process of threading through layers of fabric and padding to create a patterned surface, often with a button or knot at each point. One of the most popular applications of this technique is in the creation of a tufted headboard, which can transform an ordinary bedroom into a luxurious retreat. This article will guide you through the process of tufting a headboard, providing DIY upholstery tips to help you master this art.

The first step in tufting a headboard is to gather your materials. You will need a piece of plywood cut to the size of your desired headboard, foam padding, batting, upholstery fabric, a staple gun, upholstery needles, upholstery thread, and buttons. It’s important to choose a fabric that is durable and can withstand the tufting process. Heavier fabrics like velvet or canvas are often recommended.

Once you have your materials, the next step is to cut your foam padding to fit your plywood. The foam should be at least two inches thick to allow for deep tufts. After cutting the foam, attach it to the plywood using a spray adhesive. Then, cover the foam with batting, pulling it taut and stapling it to the back of the plywood.

The next step is to mark out where you want your tufts to be on the headboard. This is typically done in a diamond pattern, but you can choose any pattern you like. Once you have marked your tufting spots, use an upholstery needle and thread to sew through the foam and plywood at each mark, attaching a button at the front. Pull the thread tight and staple it to the back of the plywood to create the tuft.

After all the tufts are in place, it’s time to cover the headboard with your chosen fabric. Start by laying the fabric over the headboard and aligning it with the tufts. Then, using your upholstery needle, thread through each tuft from the back of the headboard, pulling the fabric tight. Once all the tufts are threaded, staple the fabric to the back of the plywood, making sure it’s pulled taut.

The final step is to trim any excess fabric and batting from the back of the headboard and cover it with a piece of fabric for a clean finish. This can be done by simply cutting a piece of fabric to size, folding the edges under, and stapling it to the back of the plywood.

Tufting a headboard may seem like a daunting task, but with patience and the right tools, it’s a project that can be accomplished by any DIY enthusiast. Not only does it allow you to create a custom piece of furniture that reflects your personal style, but it also provides a sense of accomplishment and pride in your handiwork. So, gather your materials, roll up your sleeves, and get ready to master the art of tufting.In conclusion, tufting a headboard involves several steps including gathering the necessary materials, preparing the headboard, marking the tufting pattern, drilling holes, threading the tufting needle, and securing the tufts. It requires patience, precision, and basic DIY skills. With the right tools and materials, you can transform a plain headboard into a stylish, tufted piece that adds elegance to any bedroom.